
SKINNING A HAND- THE GUIDE!
A step-by-step guide to the practical effects behind the 'He Took His Skin Off For Me' test shoot
SFX Supervisor JEN CARDNO

Step 1:
The first step was to sculpt each individual muscle group in chavant, an oil based clay that can be left out without drying out and distorting unlike water based clays. Using fine sculpting tools and lighter fluid the chavant was worked until enough detail was built up to give the effect of raw exposed muscle. The lighter fluid acts as a solvent to break down small clumps of chavant leaving a smooth fine appearance rather than the rough edges that tools used on their own can give.

Step 2:
After sculpting each piece they were layed onto boards to prepare for the moulding proccess. A wall was built around each part to provide a well for the silicone to sit in while it cures and makes a flexible negative of the sculpt. The silicone we chose for this project was Platsil Gel 10, this was mainly due to its low viscosity and quick cure time. With the silicone being so fluid it meant that all the work put into sculpting wouldn't be lost to air bubbles of pockets appearing in the mould. Also with it having a cure time of around 30 minutes meant we didn't have to wait the usual 24 hours for standard rtv silicones.

Step 3:
After leaving the moulds to cure they were flipped over and the chavant positive sculpt was carefully removed from the silicone and cleaned gently to make sure no pieces were left behind. This meant we had a bubble free clean piece of silicone with which to start casting pieces from to fit to the actor.
Step 4:
Once the moulds have been set out and ready to pour the silicone into the first step was to make sure there was an even coat of mac wax (release agent) covering the mould so that the silicone we are about to pour in doesn't stick to the mould. Casting silicone from silicone can be tricky as it inherently wants to stick to itself which means a good barrier needs to be put between both pieces or we would run the risk of having our piece fused into the mould. The release agent we decided to use was mac wax, it provides a thin barrier between the pieces and isn't thick enough to cause any of the original detail from the mould to be lost or altered in any way, at a push a thin layer of vaseline can be used - but with it being so heavy the risk is that fine detail will disappear in the release layer.

Step 5:
With these pieces movement was a key factor, they needed to move and stretch just as a real muscle does. This meant that a standard density of rubber would simply be too tough and would severly reduce movement. The way to work around this is to deaden the silicone, this introduces a bulking agent that gives it a lot more movement and can even be deadened up to the stage that it becomes a gel. We wanted somewhere between these two, giving a soft malleable feel but with enough rigidity to not droop off when applied. After a few tests we settled at 150% deadener to each mix of silicone, or a ratio of 3:1. However, with this a new set of problems occurs. The main issue when deadening silicone is that it remains tacky even when cured- meaning all detail and shape is lost. This was clearly not the desired end result and meant we needed to encapsulate each piece in order to maintain a high level of detail and make sure our muscle looked like....well, muscle.
Step 6
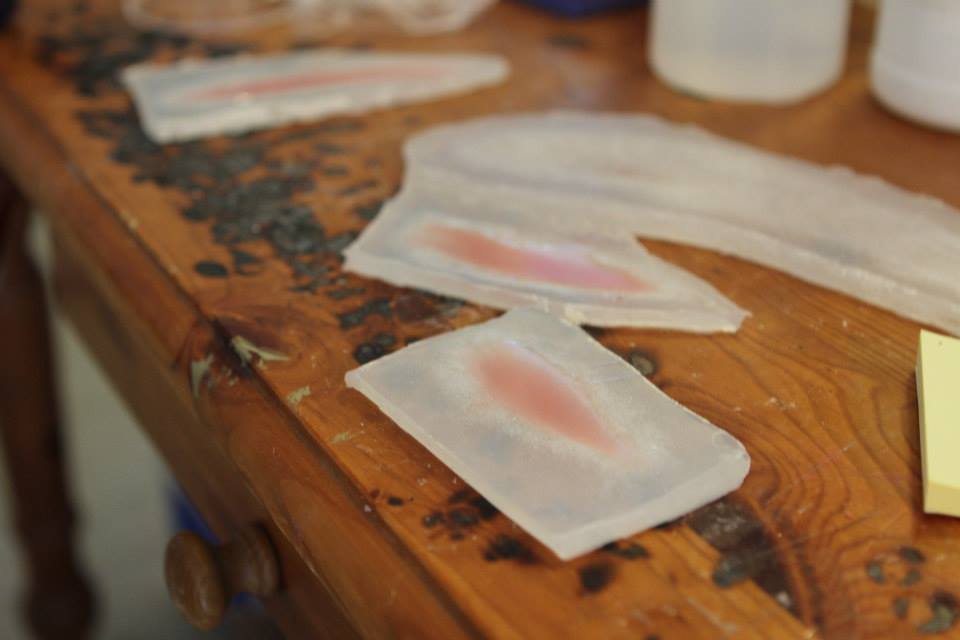
The encapsulating plastic decided on was Baldiez, this had a super high tensile strength and can be thinned down until it's thin enough to be completely translucent but still hold in the shape of our original sculpt. Another plus side to this is that it leaves us with a flap of plastic around the piece that can be later melted away with acetone to provide a smooth flush prosthetic to apply. The Baldiez was diluted at a ratio of 1:4 - any thicker and there would be a frosted effect to the finished piece. It was thinned with acetone and fed through an airbrush.

Step 7
So, we're almost ready to pour! We have our released mould, we've got a deadened mix of silicone to give a realistic muscle movement, the only problem is at the moment its an off white colour. In order to get a realistic colour we used a number of different silicone pigments and oil colours, mainly this was a flesh tint, a red, and a tiny bit of blue which may seem strange but really adds a depth to the piece by picking up on the blue hue that lies in the veins beneath our skin. With the oil colours a tiny bit of paynes grey crimson and also vermillion were applied, be sparing with these as they go a long way.
Step 8:
Now everything is ready to pour. The pigmented and deadened silicone is poured slowly into the mould making sure that it leaves an even coat with no bubbles forming on the piece. Once poured, the piece is left in a warm place to cure until it's no longer tacky to the touch.
Step 9
Once the platsil gel has cured, another coat of baldiez is sprayed lightly over the top of the piece, sealing the deadened silicone inside. After around 10 minutes the baldiez will have cured and a complete capsulated prosthetic will be set in the mould, ready to remove. The best way to remove the pieces, with them being so thin, is to dust them in talc so that none of the edges stick to one another.

Step 10:
Release!! You should now be holding a fully deadened fully encapsulated fully pigmented muscle (if it all went well, that is). The next step is applying the pieces to the actor. To do this, you want to use an adhesive that's suitable for skin contact. There are a few to choose from: prosaide, telesis or even latex. We decided to go with telesis - although slightly more expensive, it lasts a lot longer and has a really good grip which is perfect when the piece has to be moving for an extended period of time.

Step 11:
In order to make sure the piece is fully adhered to the actor, you want to apply a thin layer to both the skin and the back of the piece. This will create a tighter bond that enables a lot more movement and means you won't be constantly having to re-apply adhesive throughout the shoot, which wastes time and means the actor will be in and out of makeup all day.


Step 12:
Once the piece is fully stuck down in place you'll be left with flaps of the encapsulating plastic over hanging the main bulk of the silicone piece - don't worry! This is a good thing. Taking a cotton swap and a cup of acetone, the edges need to be pulled tight and with a rolling motion pressed down against the skin pulling away from the prosthetic until the encapsulating plastic breaks down and leaves you with a flush seamless prosthetic.

Step 13:
This step will be entirely down to personal preference and a bit of artistic licence. With the pre coloured piece applied you want to select an appropriate colour swatch with which to start building up the look of the piece. For this shoot we used a number of Skin illustrator palettes: the standard skin illustrator palette and also the zombie palette which includes a few really good tones such as bruise and aged blood, perfect for the look we were going for. The great thing about skin illustrator is that it's only activated by isopropyl alcohol, which means it's not going to get rubbed off with general wear and tear throughout the day. Again, entirely up to personal preference but the idea is to build up lots of thin layers of colour to sink into the troughs and detail of the piece and then highlight other parts with a lighter tone to give a real sense of depth and realism.

Step 14:
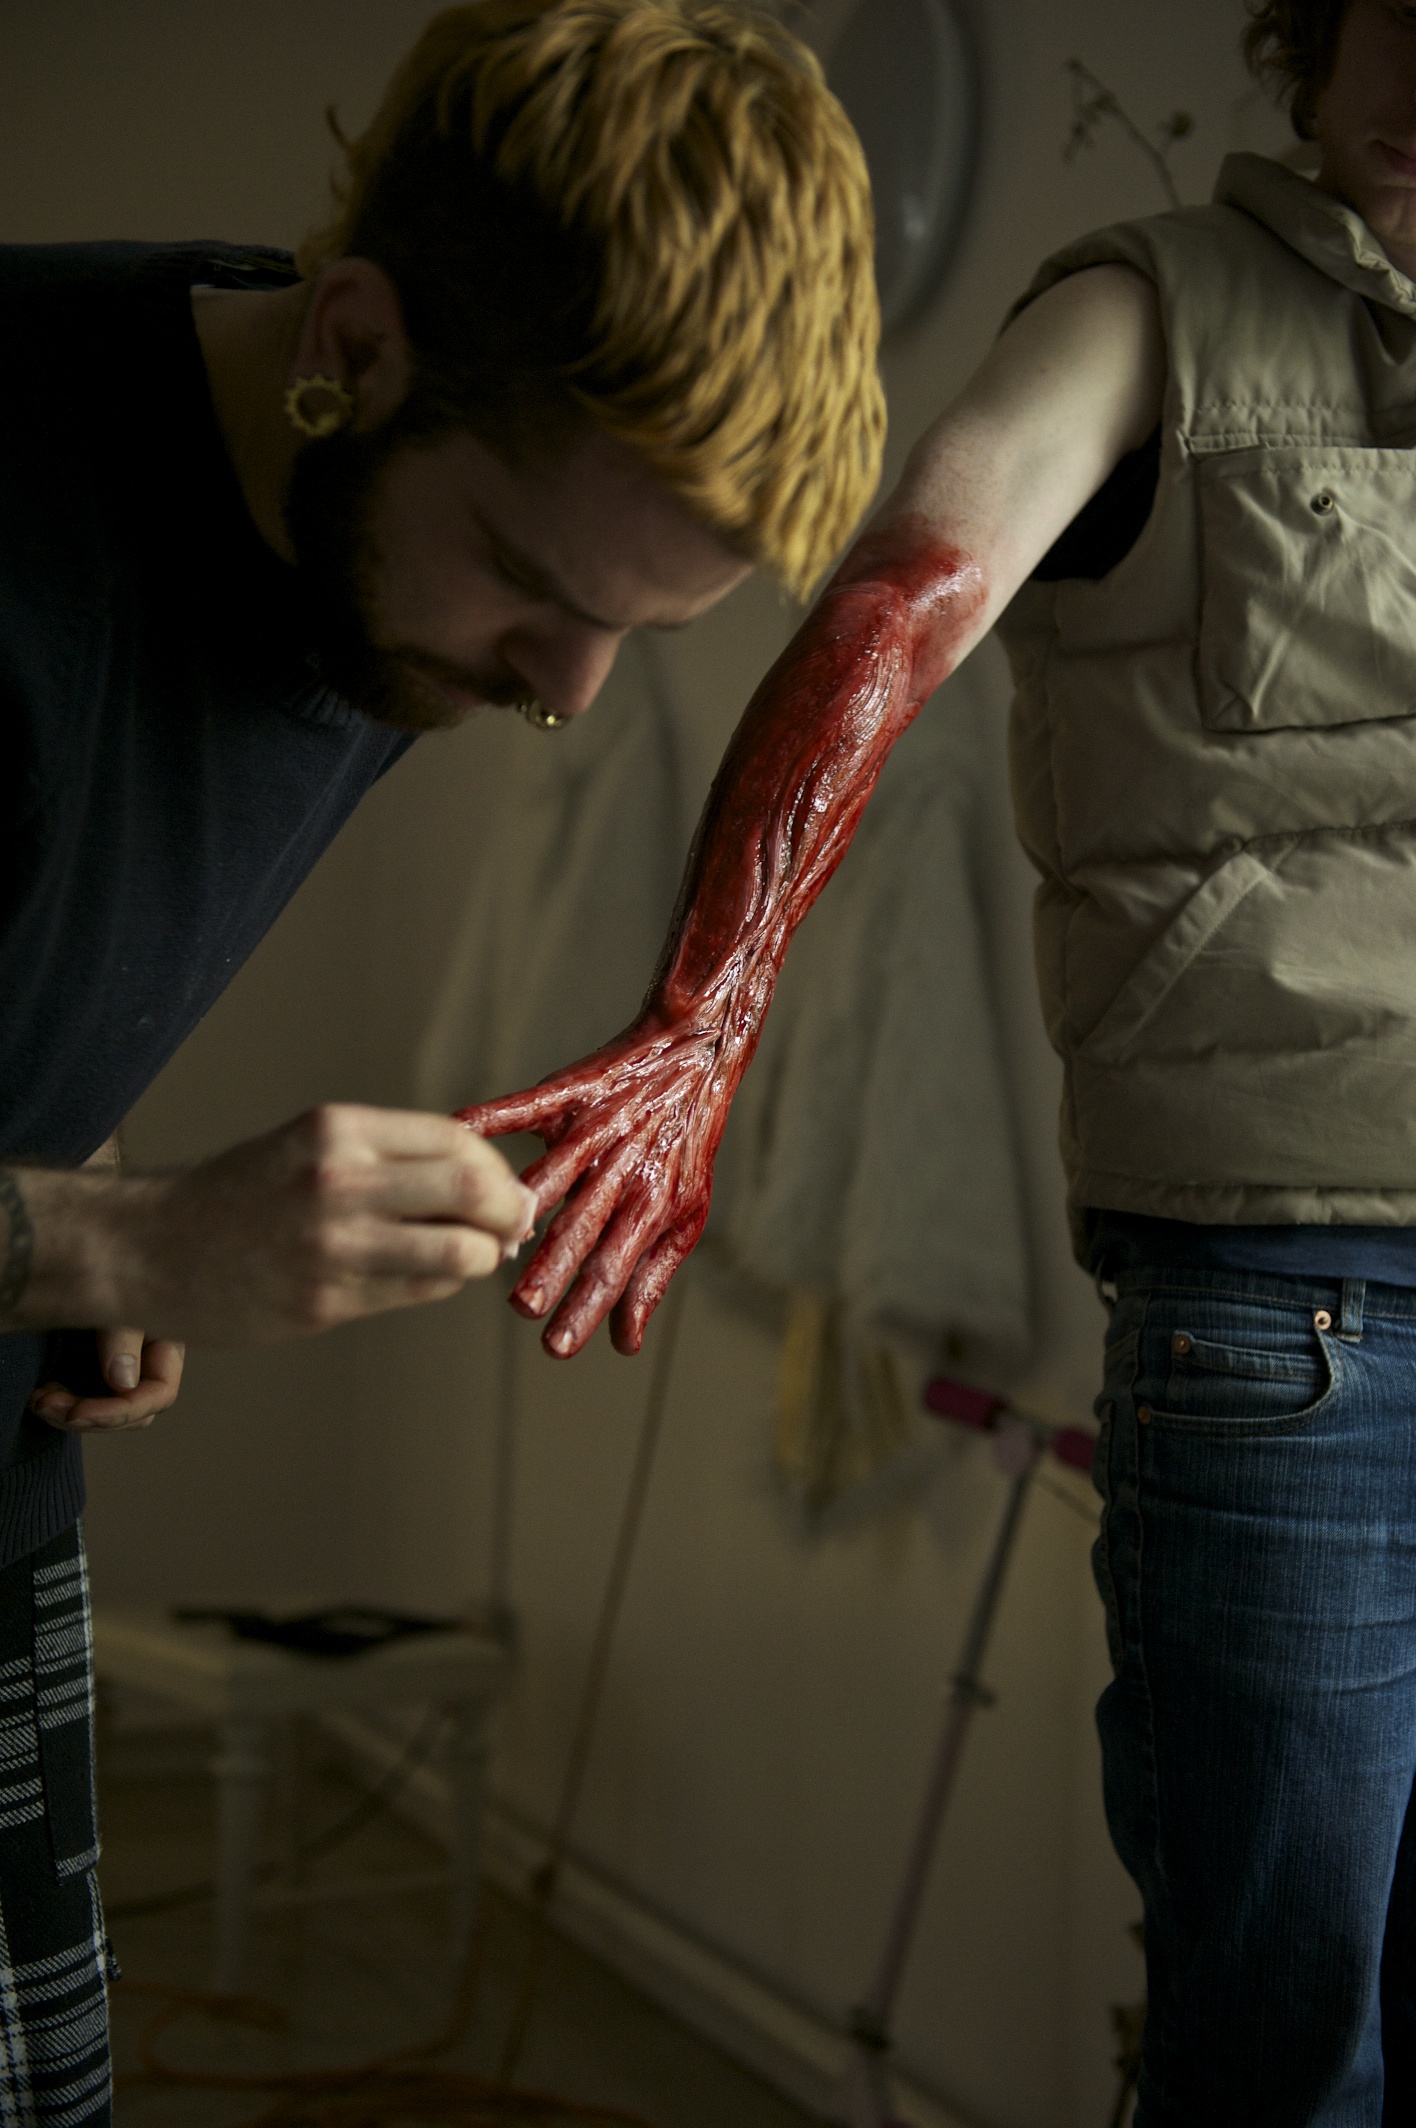
By now a number of pieces had been applied, repeating the process mentioned before to build up an entire arm prosthetic, colouring and matching to make sure it flows as a continuous piece and the colouring is the same throughout. This could have been the final step but after a bit of thought we really wanted to nail the translucent, almost wet look that flayed muscle has, and after a bit of experimentation we settled on good old ky jelly. Just enough of this really brought together the look and left a plasma-like appearance to the muscle that finished it off better than we could have hoped.

Thanks so much for reading the guide,
we hoped you found it helpful!
He Took His Skin Off For Me --- Official Website
| Official Website of the Short Film by Ben Aston, based on the Short Story by Maria Hummer
'He Took His Skin Off For Me' is a Practical SFX Short Film by Ben Aston, about a man a man who takes his skin off for his girlfriend, and why it probably wasn't the best idea... Based on the Short Story by Maria Hummer, Produced by Fiona Lamptey